|
Enemies: Black Ant: 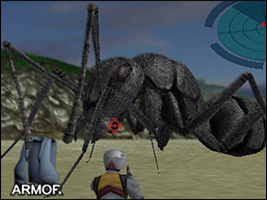 The standard cannon fodder enemy type of the game, seen in over half of the available missions, and the only enemy faced in the beginning three. They can try to bite, if you are close, or throw some acid at you from a distance, but are fairly docile and die quick. At least on the lower difficulties. Red Ant: 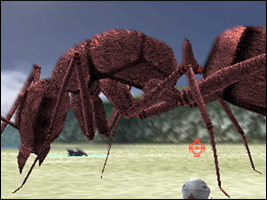 Sometimes referred to as crimson ants, these upgraded ants are red, bigger, meaner and generally a lot more aggressive than their black brethren. They don’t really come with any new types of attacks, but hold back way less with them. Queen Ant: 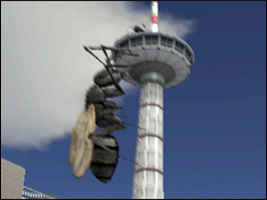 The final type of ant and one of the last new enemy types introduced to the game. The ant queens are gigantic black ants with wings on their backs, though they do not fly yet. The acid coming out of their abdomen is not only way more potent, but comes down in one gigantic shower that can easily blind you. Saucer: 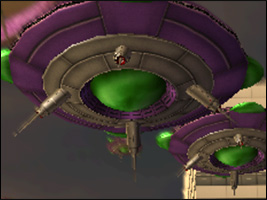 The second enemy type showing up in the game are these small UFOs who are usually getting spawned by drop ships or the mothership. They are fairly easy to shoot down but the damage from their lasers can quickly add up if they swarm you. Upgraded Saucer: 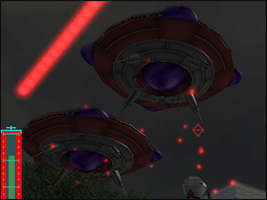 Another red dye job of an existing enemy. Thankfully only seen in two missions, because they are one of the most annoying ones in the game. Behaving like the regular saucers, they are simply a lot harder to kill. Not just because they are tankier, but they also seem to almost never stand still and also ricochet all over the place on impact making it very hard to keep hitting them with several shots in a row. Drop Ship: 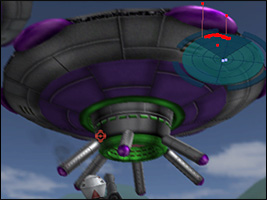 These big UFOs, sometimes called carriers, never actually attack the player by themselves. They simply hang out to constantly spawn more enemies out of the round hatches at their bottom. You might think, especially if you played later games, that they can only be destroyed by shooting directly into the open hatches. But actually, anywhere is fine, making them fairly easy to take out with rocket launchers. Walker: 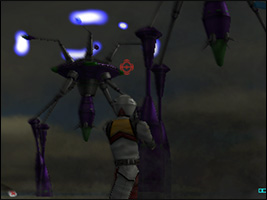 The official name for these machines inspired by the War of the World tripods seems to be Dargoga, but the game itself always only refers to them as walkers, at least in the English release. They slowly walk on their four long legs towards your position while shooting laser beams from afar, being able to put on the heat with additional gunshots once they are close enough. Kaiju: 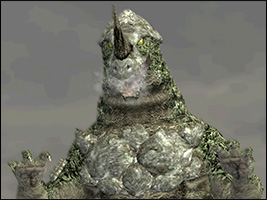 What would be a cheap b-movie inspired game about alien invaders and monsters be without their own Godzilla inspired Kaiju? The sauros only appears in two missions, first alone, then with a partner. It can quickly close the distance by running at you, but often stays back to breath fire or destroy buildings. An ample opportunity to shoot at the large target from afar. Mecha Kaiju: 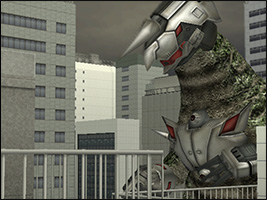 Only seen in one mission and the last enemy to be introduced in the game. The Kaiju now is upgraded with mechanical parts. It mostly acts the same as their standard version, maybe with a bit more aggression, yet comes with the addition of longer distances laser beams. Mothership: 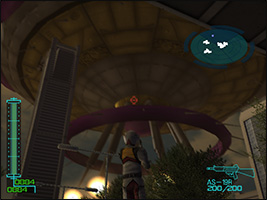 The mothership of the aliens shows up in several missions, but forms the final enemy of the game. Mission 25 is indeed the only time it can be seriously damages at all. Mostly being a screen spanning drop ship that spawns more saucers, it comes with additional cannons on its underbelly. Those can usually be shot down even in missions where the mothership itself cannot be destroyed. Unlike the drop ships, the mothership is only vulnerable by shooting into the opened hatch while it spawns more saucers. |
|
Areas: City 1: 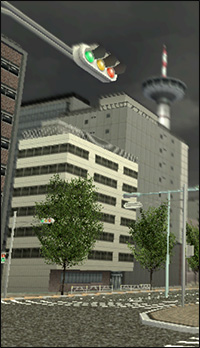 The first city map is the most used map in the whole game, the eleven appearances almost amounting for half the game. This downtown area in the tight city streets is dominated by a communications tower, which will often have ants crawl all over it. City 2: Another downtown map starts you off in a bit more of an open space in front of a gigantic skyscraper. Ruined City: The third city map only has a few buildings still standing, leaving behind a mostly big open space that only has the wall foundations sticking out of the ground. Mountain Ravine: One tight riverbed is snaking through the mountains. Usually, the player starts on the upper ground, but one mission has them in the riverbed itself with the enemies coming down from all sides. Beach: Back to the large open spaces, the player will always start out on the wide strip of sand, while sometimes enemies will approach from the ocean, during other times they come down the distant mountains. |
|
Vehicles: Personally, I’m not a big fan of using the vehicles to fight off enemies in the series, preferring the more direct approach. But the first game already offers three types of alternatives to your guns. A hoverbike that is quick but fragile, a sturdier but also slow moving and slow shooting tank, and a helicopter to more easily fly across the map and more easily shoot down flying enemies. Not all three transportation types are present in each mission, but with the exception of mission 18, at least one should be found in each of them. 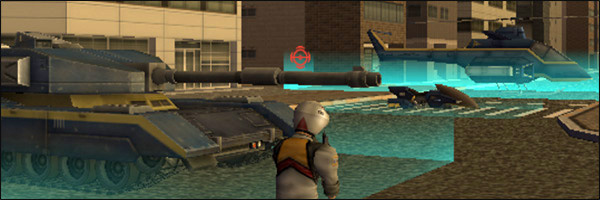 |
|
Drops: Defeated enemies drop plenty of upgrades, but only four different types of them, which are generally fairly self-explanatory. The green suit-case with the word WEAPON on it will offer you a random weapon drop at the end of the mission. Out of a certain pool of available ones depending on the mission and difficulty it was played on. Duplicates can drop, so you don’t always get something new. Meanwhile every picked up vest-like icon saying ARMOR will increase the Troopers’ maximum hitpoints by a few. The other two drops, the small round ones and the big cases with red crosses on them, are small and big healing items respectively. They are automatic, healing a smaller or bigger chunk of your health as you walk over them.  |
|
Tips: 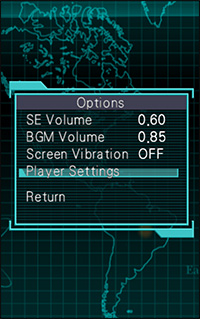 The game is fairly simple and easy to understand, but here are a few tips for how to change the options to make it play smoother. At least I do prefer those settings, so it’s worth trying out which type one prefers. The game is fairly simple and easy to understand, but here are a few tips for how to change the options to make it play smoother. At least I do prefer those settings, so it’s worth trying out which type one prefers.
While it is immersive that any time something bit hits the city, the whole screen shakes, I find it a bit annoying and distracting and also possibly motion sickness inducing. It can be turned off under “Options: Scren Vibration” Similarly, any time some big set piece happens, the game automatically focuses on it. Once again, cool in concept, I find it annoying to not be able to shoot at the enemies in front of me anymore, because the game wrenches my camera away from me to look at the mothership in the sky. It can be turned off under “Options: Cinema Cam”. The third and last thing in the Options menu I like to change is the Player Controls. When set to normal the camera turns with the player character. I prefer the standard controls of later games where the left stick turns the character, while the right stick independently controls the camera, and shooting and weapon switching is on the shoulder buttons. To enable these controls, you have to change Player Controls to TECHNICAL. Not an option, but do not forget to use the big SAVE option in the main menu before turning the game off. There is no auto saving and you wouldn’t want to lose your progress, would you. |
 Compared to most Simple Line games, Earth Defense Force did prove popular enough to not only get a sequel and a spinoff on the PS2, but also migrate into the market of full price releases later, where it is still going strong to this day.